
Contact Page is essential for every website. It helps the users to communicate with you and ask their queries and problems about
the posts you published. So in this post, I will show you how to create a Contact Page having a Contact Form on it.
the posts you published. So in this post, I will show you how to create a Contact Page having a Contact Form on it.
1. First of all go to www.foxyform.com.

2. There are 4 easy steps for creating a contact form. Select what you want in your contact form. Select Name, email and Subject only.

3. Now in step 2, select Background color, Font, Font color and Font size.

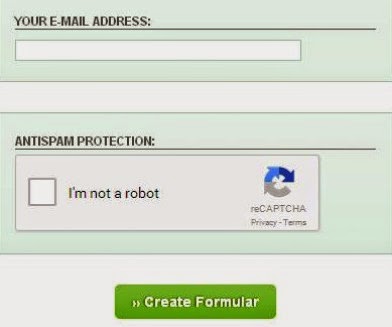
4. In next steps, enter your email ID in which you want to receive messages, verify that you are not a Robot and click on "Create Formular". Copy the Code and save it on your computer in text or word file.
5. Now go to www.blogger.com and sign in with your Gmail ID.
6. After signing in, Blogger dashboard appears. On dashboard, click on the arrow pointing downward on the right upper corner of the dashboard as shown in the image:

7. After clicking on the arrow, a list appears. Select "Pages" from the list. Following page appears:

8. On this page, click on New Page. The following page appears.

9. Click on "HTML" option. A code is written already here like this:
<div dir="ltr" style="text-align: left;" trbidi="on">
<br /></div>
10. Now copy the code of the contact form which you save in your computer and paste it below the above code on that page. Give the title of the page as "Contact me" and click "Save" and then click "Publish".
You have done! A contact page with a contact form is created on your blog.
You also want to read How to improve Internal Linking of a blog


